
Want to send gallery visitors directly to specific pages? Maybe a blog post, a collection page, or even an external site? With link tagging, you can turn any gallery image into a clickable gateway to anywhere on the web!
How to Add a Link to an Image
Follow these simple steps to add a custom link to any image in your gallery:
- Open Covet.pics and select your gallery from the left menu
- Find the image you want to make clickable
- Hover your mouse over the image
- Click the Edit button that appears
- In the editing panel, click Tag Link
- Fill in the link details:
- URL: Type or paste your full link (be sure to include the "https://" part)
- Link Title: Add a descriptive name for your link
- Icon (Optional): Upload a small image to represent this link visually
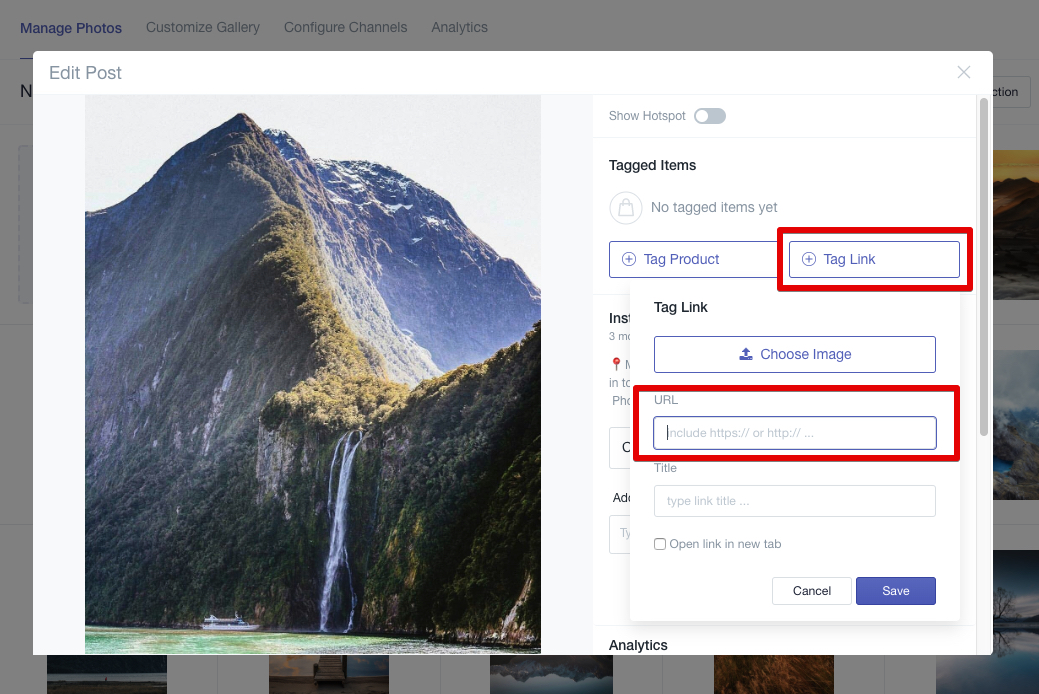
- Click Save to apply your link
That's it! Your image now has a clickable link attached to it. 🎉
Creative Ways to Use Image Links
Here are some ideas for making the most of this feature:
- Link to matching accessories for outfit photos
- Connect lookbook images to specific collections
- Link behind-the-scenes photos to your brand story page
- Direct visitors to how-to guides or tutorial videos
- Link seasonal photos to limited-time promotions
Pro Tips for Link Tagging
- Be strategic: Only add links when they truly enhance the customer journey
- Use descriptive titles: Help visitors understand where the link will take them
- Test your links: Always click through after adding to make sure they work
- Consider icons: Visual cues can increase click-through rates
Need to Change or Remove a Link?
Simply repeat the steps above and either:
- Enter a new URL to change the destination
- Leave the URL field blank to remove the link completely
Need more help with link tagging? We're always here for you at support@spacesquirrel.co!